
Evening Makeup Look for the New Year!
Hello everyone!! I hope you are having a great start to the new year. This is my first post of 2017, and I decided to share how I achieved this quick makeup look.
I love blue shades on the eyes, so when I saw this cute palette at Target, I could't resist buying it. This may not be your every day makeup look, but it would be great for special events. Since there are no rules to makeup, you can totally rock this whenever you would like! :)
So let's get started...
First, I washed my face, and applied a moisturizer. I think this is a very important step, and you should not miss it, especially if you have dry skin like me. A moisturizer creates a layer between your foundation and your skin, and it will help create a perfect, non-cakey look.
Next, I applied Benefit Porefessional Primer, which hides pores, and makes the skin look smooth.
After that, I put a few drops of Maracuja Oil in my T zone, because this is where my skin is very dry. Sometimes, when I apply foundation, my T zone looks patchy, which is not attractive. I found that using this oil helps with this problem a lot.
While my skin was soaking up the products I had just used, I filled in my eyebrows using a L'Oreal brow pencil, and a dark brown eye shadow on top to set my brows. Then, I began working on my eyes. I know that some makeup artists use primers for eyelids, but I use my concealer and a little bit of powder to set it. I started with the transition shade, which is a peach/brown shade from one of my e.l.f. black little book palette. I forgot to include it in the photos, but I added a link to where you can take a look at this palette. The transition shade goes on your brow bone, a little higher than your eyelid. You can use a wiping motion in order to apply it.
Next, I applied the third shade of my Maybelline palette (see photos below) all over my lid. A trick that I use to make eye shadow more eye-catching is to spray a brush with MAC Fix spray, or you can just dip it in the water before putting eye shadow on it. Once this shade is applied, I used a transition shade brush, and blended the two shades with a wiping motion.
In the inner corner of my eyelid, I applied a second shade from the left of the same palette, and used a transition shade again to blend it all together. Also, make sure that you cannot see the line between the blue and turquoise shades by blending them together. Use the same brush you used to apply either of the two shades.
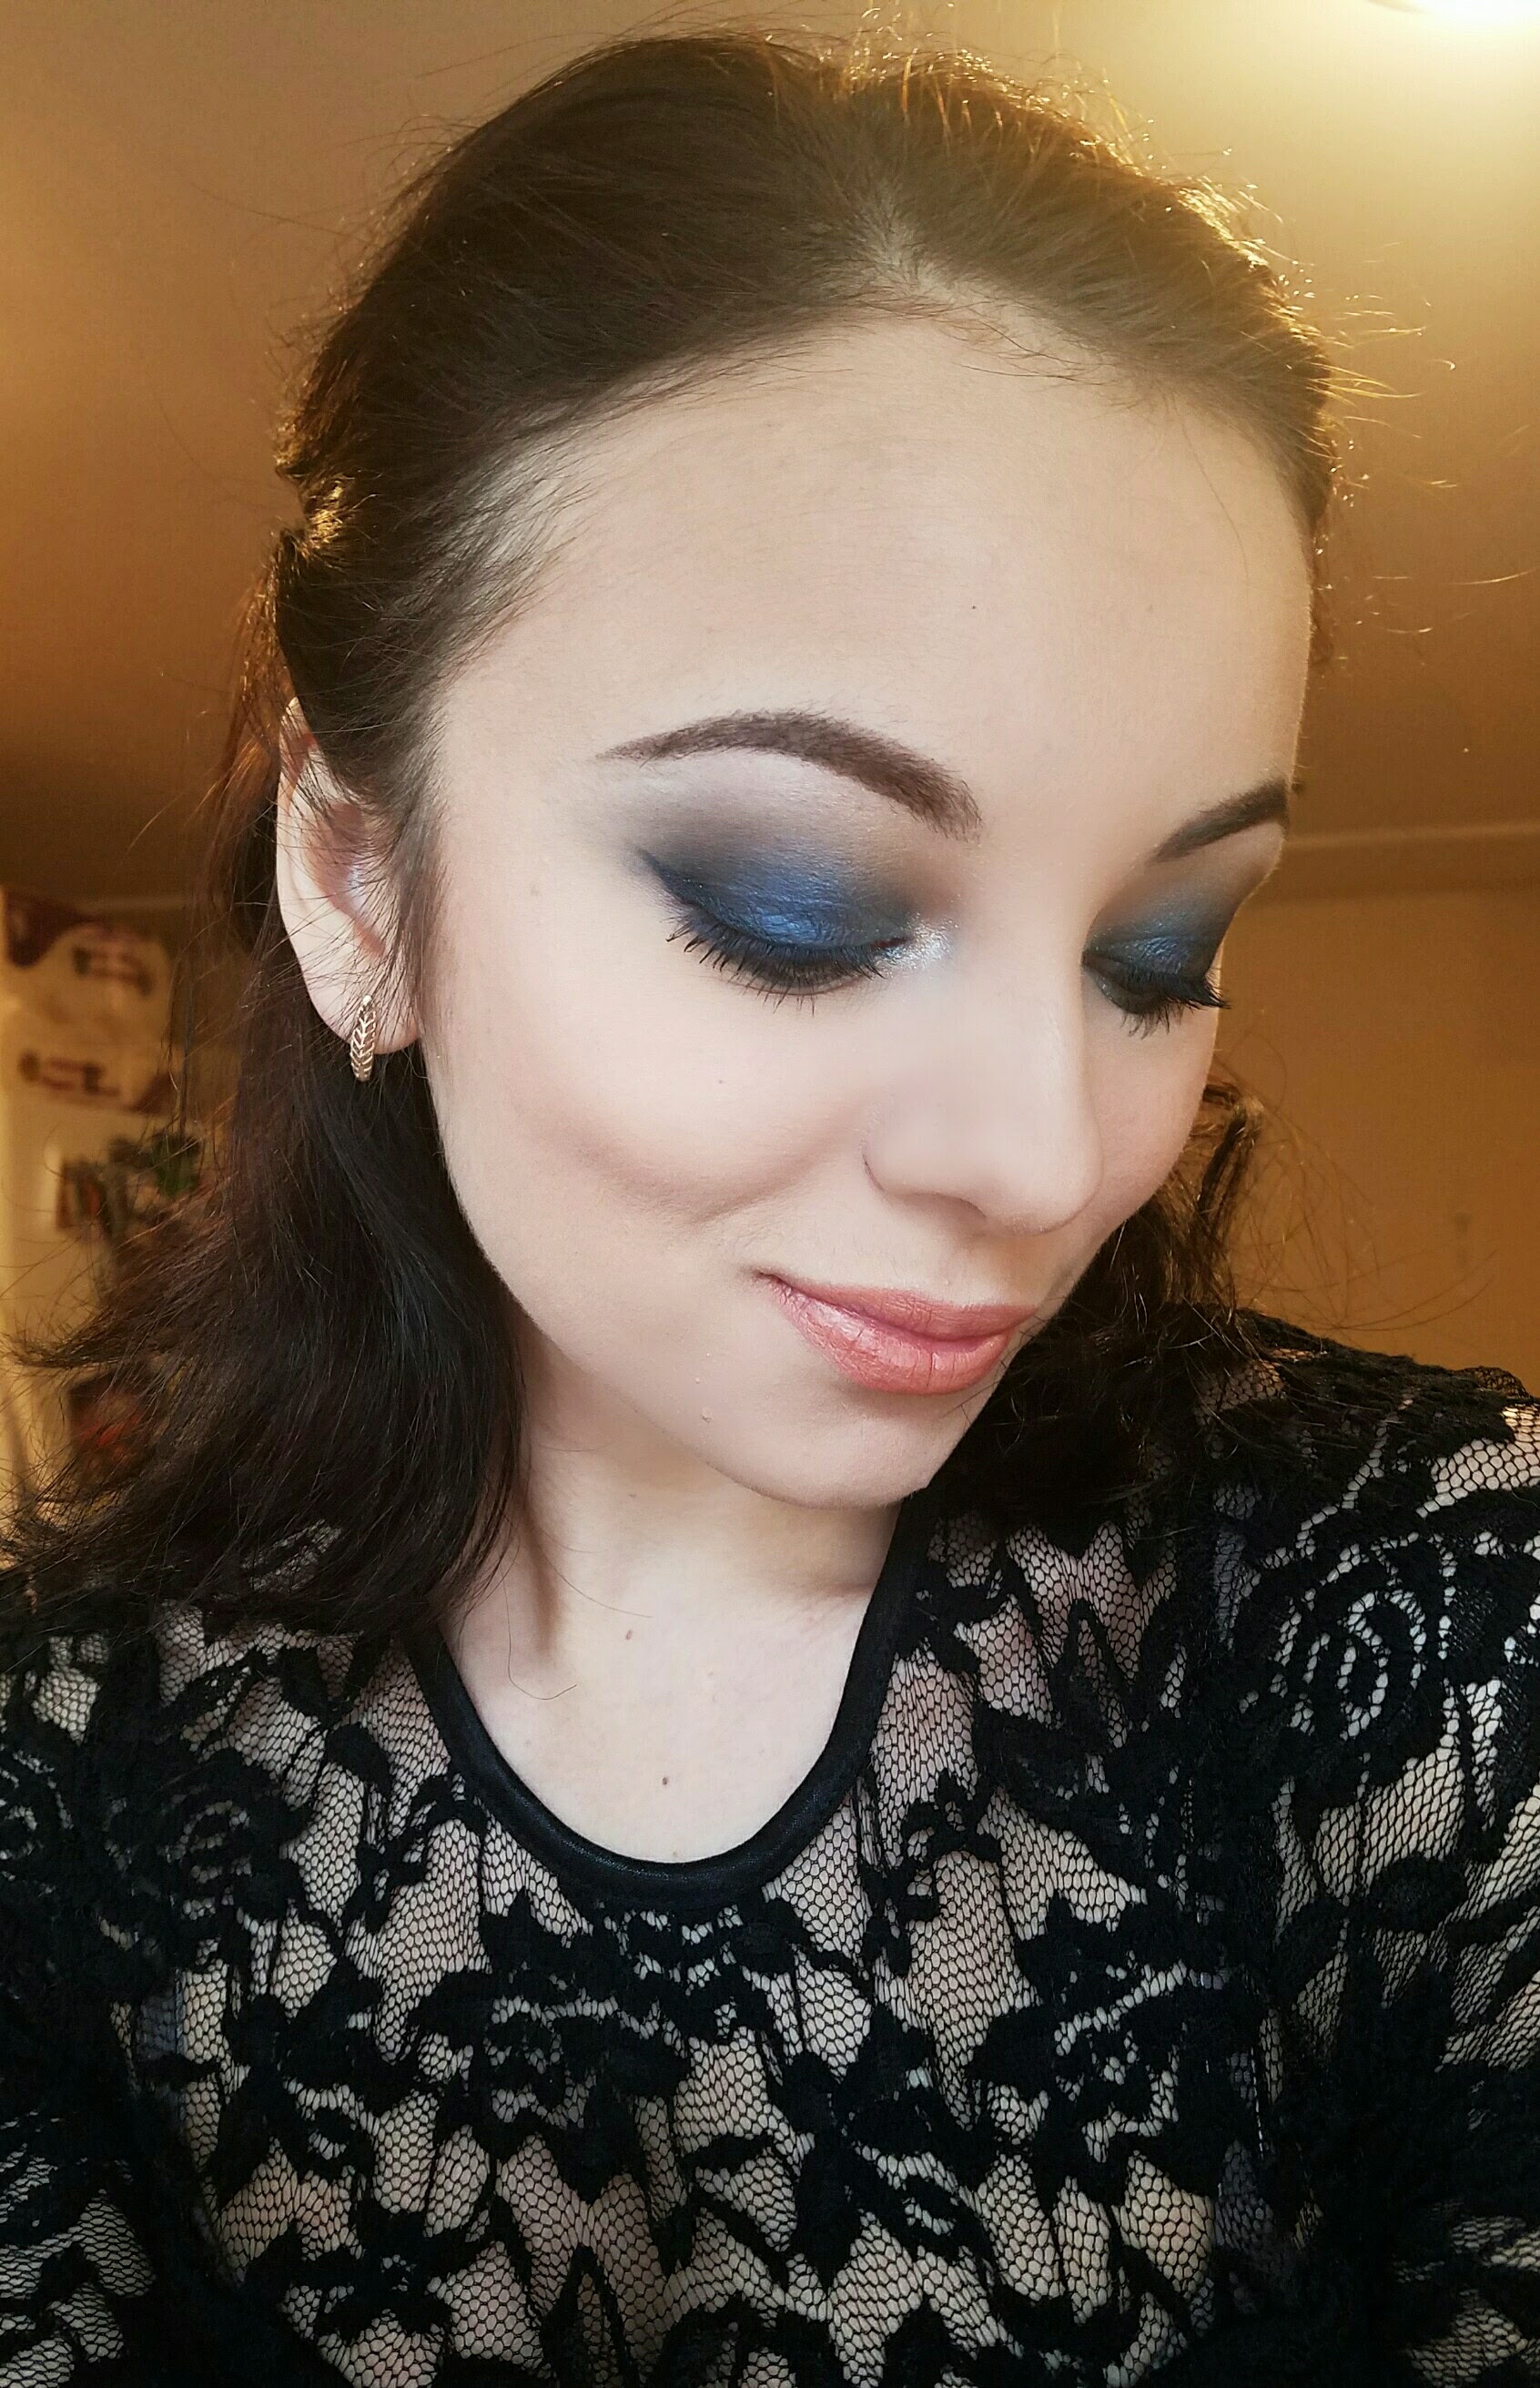
Then, I applied the dark shade on the outer corner of the eye, and blended it with the same brush using a wiping motion yet again to create a subtle crease. I also used a white shimmery shade from the palette in the inner corner of my eye. Then, I used an eyeliner to create a wing. You can use any eyeliner you have! Next goes mascara, and I also applied the blue shade to the bottom outer corner of my eye. Taaadaaa, the eye look is all finished! Do as much blending and adding of each shade as necessary!
Now onto the face... I applied my Fit Me foundation, which is matte. Usually, I like using foundations that create a more dewy look, but since I used the oil, this matte foundation also worked its wonders. I blended in the foundation using a Real Techniques sponge, which is on sale at Target. I bought this sponge and two other Real Techniques brushes for only $17 not too long ago! So cheap, right?
Don't forget to also apply your foundation to your neck, because as much as your foundation matches your skin, it can still look a little different from your neck.
Next came the concealer, which I applied in the middle of my forehead. Then I did a strip down the nose, a triangle under my eyes, on my cupid's bow, and on my chin. I blended it all out using the same sponge, and set it with powder. When I set the concealer, I applied the powder using my sponge, and gently pushed it into the skin.
After these steps, I applied a little bit of bronzer all over my face to warm it up, and applied it noticeably under my cheekbones and the top of the forehead to create a more dimensional looking face. Make sure to spend some time blending out the bronzer to avoid having a distinctive brown line. Next, I applied an e.l.f. blush, which already has a shimmer in it. That creates very nice dewy cheeks. If you ever apply too much blush or bronzer, you can simply use a powder on top of it to blend it all out.
Then, I applied Revlon balm, and sprayed my face with Maybelline Master Fix Spray to set the whole face.
That's it! Super easy! :)
What do you think of this look? Would you like to see more of these makeup tutorials? Let me know in the comments. :)
Primer: Benefit Porefessional
Maracuja oil: Tarte (Vegan Face Oil)
Foundation: Maybelline Fit Me Matte+Poreless (115 Ivory)
Concealer: Maybelline Fit Me (15 Fair)
Setting Powder: Tarte Smooth Operator
Powder Contour: Jelly Pong Pong Cosmetics
Blush: e.l.f. Baked Blush (Peachy Cheeky)
Eye-Shadow Palette: Maybelline Eye Studio (20 Sapphire Siren)
Brows: L'Oreal Brow Stylist Sculptor (365 Dark Brunette)
Mascara: L'Oreal Voluminous Curved Brush (Black)
Lips: Revlon Colorburst Matte Balm (230 Complex)